
Hello Kitty has charmed hearts across generations with her timeless design and adorable personality. If you’re looking to create a show-stopping cake for a birthday, celebration, or just because, a Hello Kitty-themed cake is a perfect choice. Not only is it visually stunning, but it also allows you to showcase your creativity and baking skills. This guide will walk you through the process of crafting the perfect Hello Kitty cake at home, step by step. Whether you’re a seasoned baker or a beginner, you’ll find helpful tips and tricks to make this cake a masterpiece.
Choosing the Right Tools and Ingredients for Your Hello Kitty Cake
Before you begin, it’s essential to gather the necessary tools and ingredients. Proper preparation ensures a smoother baking process and a polished final product.
Essential Tools:
- Hello Kitty Cake Mold or Stencil: A mold simplifies shaping the cake, while a stencil helps you outline Hello Kitty’s features.
- Piping Bags and Nozzles: These are indispensable for adding intricate details like whiskers and borders.
- Offset Spatula: Ideal for spreading frosting evenly.
- Rolling Pin: Useful for rolling out fondant smoothly.
- Mixing Bowls and Whisks: Basic tools for preparing your batter and frosting.
Key Ingredients:
- Cake Mix or Homemade Batter: Vanilla, chocolate, or strawberry are popular choices.
- Buttercream Frosting: For crumb-coating and detailing.
- Fondant: White, pink, and black for Hello Kitty’s signature look.
- Edible Decorations: Pearls, bows, or glitter to enhance the design.
Pro Tip:
Use high-quality ingredients to achieve a delicious and visually appealing cake. Fresh butter, real vanilla extract, and premium fondant make a noticeable difference.
Step-by-Step Guide to Baking the Hello Kitty Cake
Now that you’ve gathered your supplies, it’s time to start baking. Follow these steps to create a solid foundation for your cake.
1: Preparing the Cake Batter
- Set your oven to the temperature indicated in your recipe and allow it to preheat.
- Grease and flour your Hello Kitty mold or standard cake pan to prevent sticking.
- Prepare your cake batter according to the recipe, ensuring it’s smooth and lump-free.
- Pour the batter into the mold or pan, spreading it evenly.
2: Baking the Cake
- Bake the cake until a toothpick inserted into the center emerges clean.
- Let the cake cool in the pan for 10-15 minutes, then transfer it to a wire rack to cool fully.
3: Leveling and Crumb-Coating
- Use a serrated knife to level the cake, ensuring a flat surface for decorating.
- Apply a thin crumb coat of buttercream frosting to seal in any loose crumbs. Chill in the refrigerator for 20-30 minutes to set the crumb coat.
Decorating Your Hello Kitty Cake Like a Pro
This is where the magic happens! Transform your baked cake into a stunning Hello Kitty creation with these decorating tips.
1: Covering the Cake
- Roll out white fondant to a size large enough to cover your cake. Gently drape it over the cake and smooth it out with your hands or a fondant smoother.
- Trim any excess fondant using a sharp knife or pizza cutter.
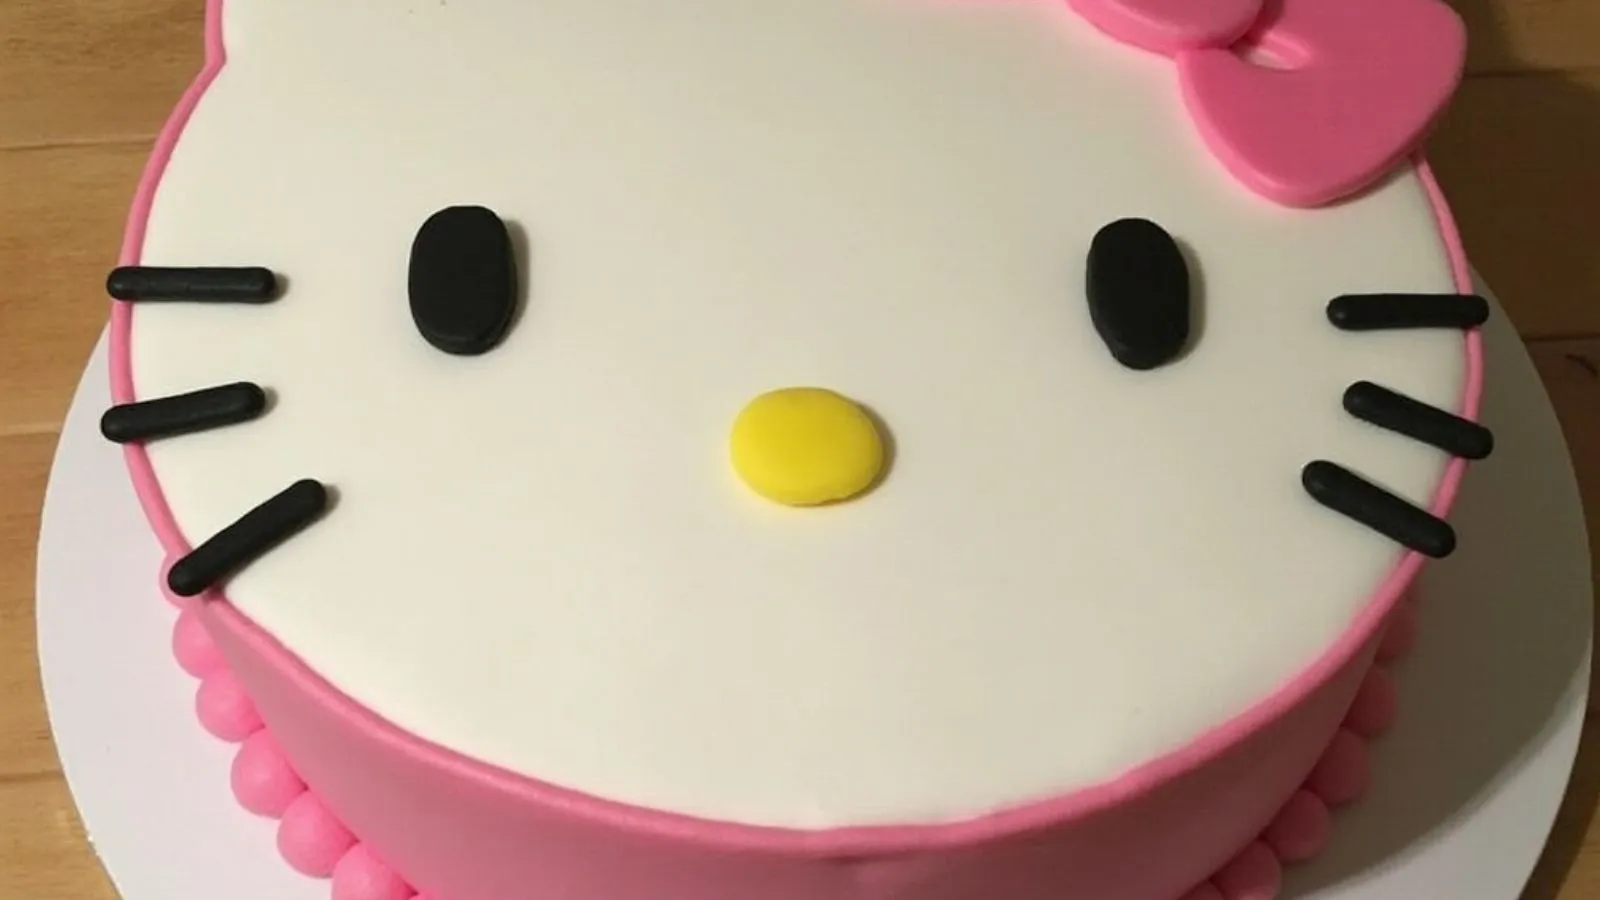
2: Adding Hello Kitty’s Features
- Eyes and Nose: Use black fondant for the eyes and yellow fondant for the nose. Roll small pieces into the desired shapes and adhere them to the cake with a dab of water or edible glue.
- Whiskers: Pipe black buttercream to create whiskers on both sides of the face.
- Bow: Roll out pink fondant and shape it into a bow. Attach it to the top left of the cake for Hello Kitty’s signature look.
3: Finishing Touches
- Add edible glitter for a sparkling effect.
- Use small fondant flowers or pearls to decorate the edges of the cake.
- Pipe borders or patterns along the base of the cake for a polished finish.
Creative Hello Kitty Cake Variations
Want to give your Hello Kitty cake a unique twist? Here are some creative variations to spark your inspiration.
1. Hello Kitty Birthday Cake
- Design a multi-tiered cake with Hello Kitty’s face on the top tier and complementary patterns on the lower tiers.
- Incorporate elements like balloons, candles, or party hats for a festive vibe.
2. Fondant Hello Kitty Cake
- Use fondant to craft a 3D Hello Kitty figure that sits atop the cake.
- Add fondant accessories like handbags or bows for extra charm.
3. Mini Hello Kitty Cupcakes
- Bake individual cupcakes and decorate each with Hello Kitty’s face.
- Perfect for parties or as take-home treats for guests.
4. 3D Hello Kitty Cake
- Shape the cake into a full Hello Kitty figure, complete with a body and accessories.
- This advanced design requires carving skills but creates a stunning centerpiece.
Tips for a Successful Hello Kitty Cake Baking Experience
Creating a Hello Kitty cake can be a rewarding experience, but it’s not without challenges. Here are some tips to ensure success:
Avoid Common Mistakes:
- Fondant Cracks: Knead fondant thoroughly before rolling it out to prevent cracking.
- Uneven Frosting: Use an offset spatula for smooth and even frosting application.
- Overworking the Batter: Mix the batter just until combined to avoid a dense cake.
Manage Your Time Effectively:
- Break the process into stages: baking, cooling, and decorating.
- Start a day or two in advance to avoid last-minute stress.
Presentation Matters:
- Use a decorative cake stand to elevate your creation.
- Arrange props like Hello Kitty figurines or themed napkins around the cake for added flair.

Storage Tips:
- Store the finished cake in a cool, dry place to prevent the fondant from melting.
- Store any leftovers in an airtight container in the refrigerator to keep them fresh.
Conclusion
Creating a Hello Kitty cake at home is a delightful way to celebrate a special occasion and bring joy to Hello Kitty fans of all ages. By following this guide, you’ll be able to craft a cake that’s as delicious as it is beautiful. So gather your tools, roll up your sleeves, and let your creativity shine!
Don’t forget to share your Hello Kitty cake creations with us in the comments below. If you enjoyed this guide, subscribe to our blog for more baking tips, tutorials, and inspiration. Happy baking!